Login
Login

How to submit apps to Android
Sign up here for the Android Developer Program. Google has a one time fee.
Usually Android apps go live on Google Play in 2 hours after submission.
App names for the apps to be submitted to Android Market Place must contain no more then 30 characters.
As with Apple, prior to having purchased your subscription you can test your app on your Android device by using the free Snappii Preview App located in the Google Play store: https://market.android.com/details?id=com.store2phone.Snappii or making a web2phone copy. Previewing/testing your app is as simple as downloading the Snappi Preview App logging in with your Snappii credentials and you can then see and test the functionality of your app exactly as it will appear when released (except for white label).
From the Editor or from the “My Apps” click the Publish button and choose Android, enter your credentials and we’ll do the rest. We would need access to your Google Play Developer Console to successfully complete the submission process. Continue reading “How can I submit my app to Google Play?” »
Within the Snappii Preview App on your smart device, just press “Back to Snappii” and then click on “View” or “refresh” in app list. All the updates/changes you have made will be immediately viewable.
To enable automatic app publishing for Google Play, follow the steps below:
1. Open Google Play Developer Console and go to Settings – API access
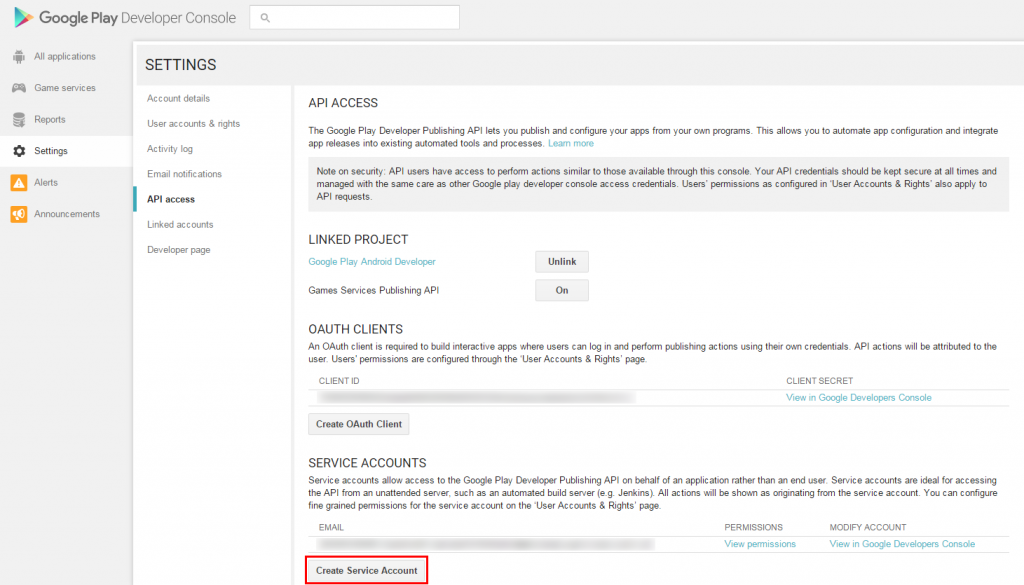
2. Click “Create Service Account”
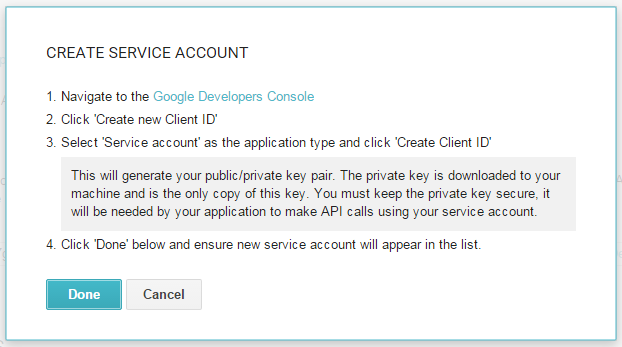
3. Go to the link from the first point in the popup window “Create Service account”
4. Choose New credentials – Service account key
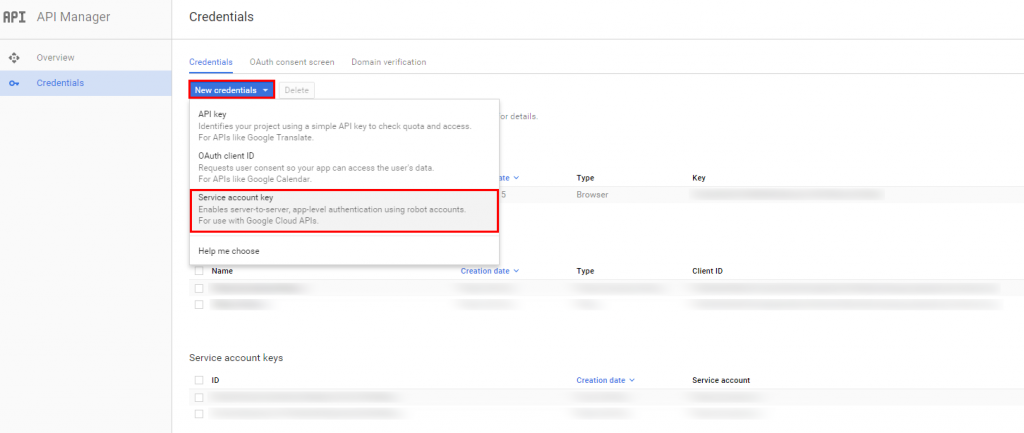
5. In the Service account drop-down choose New service account
6. Specify any account name. In our example: snappii-publisher
7. Then choose JSON key type and click Create
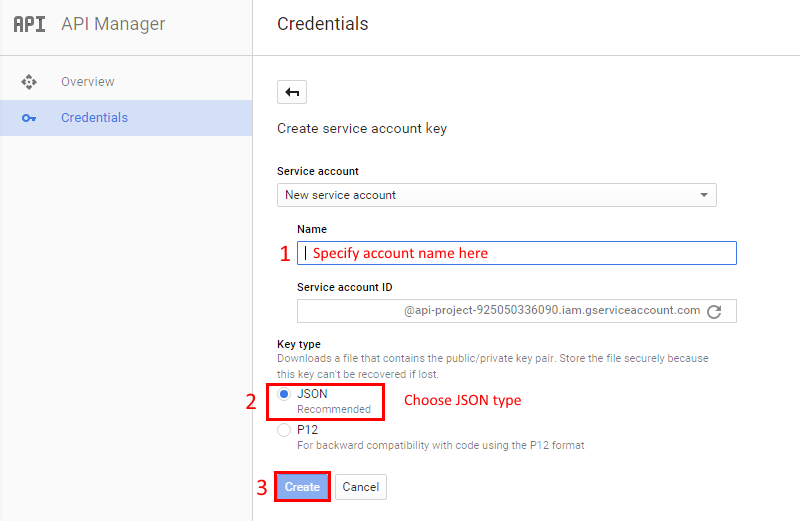
8. After that your browser will ask you to save key file. Please, save it.
9. Then go back to Google Play Developer Console – Settings – API access
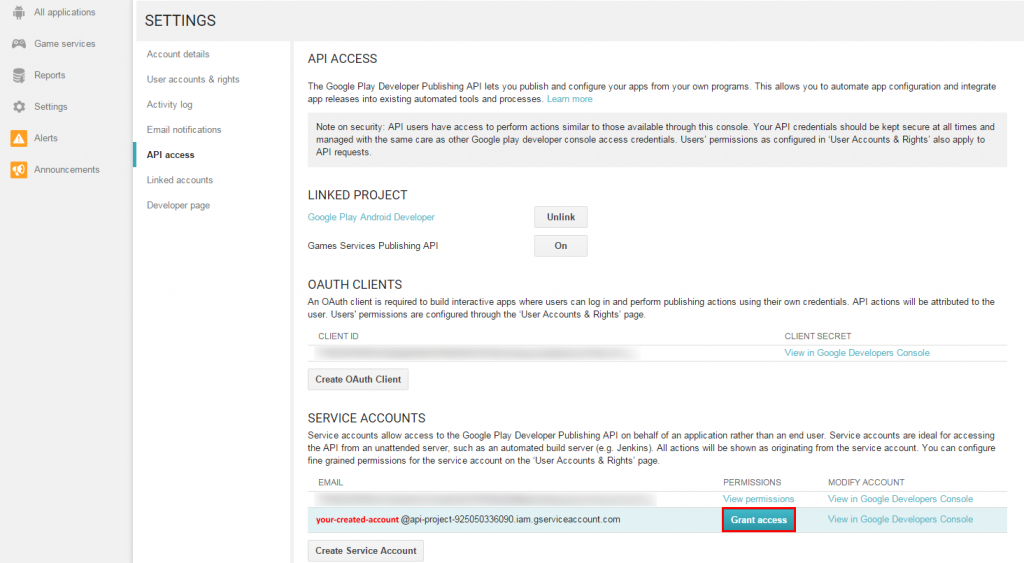
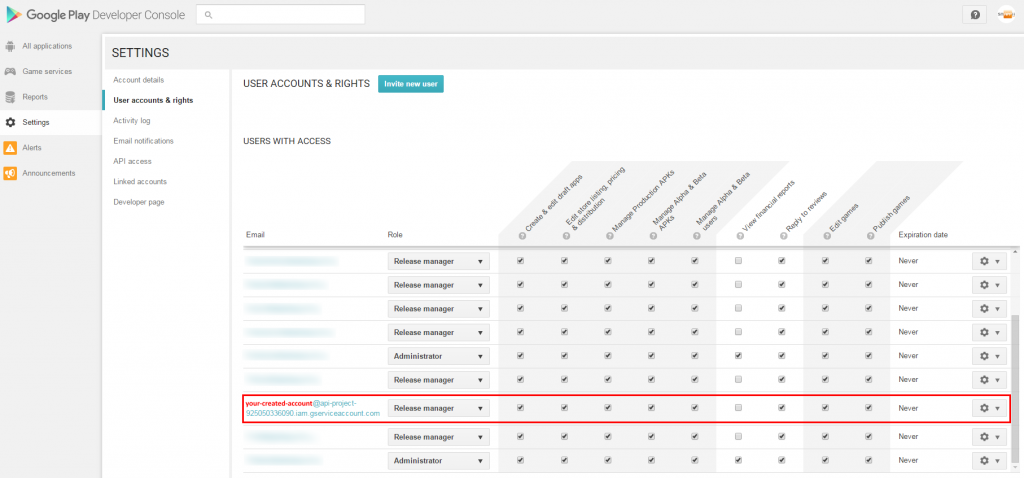
10. There you will see your created service account. Click Grant access to specify access rights for this account.
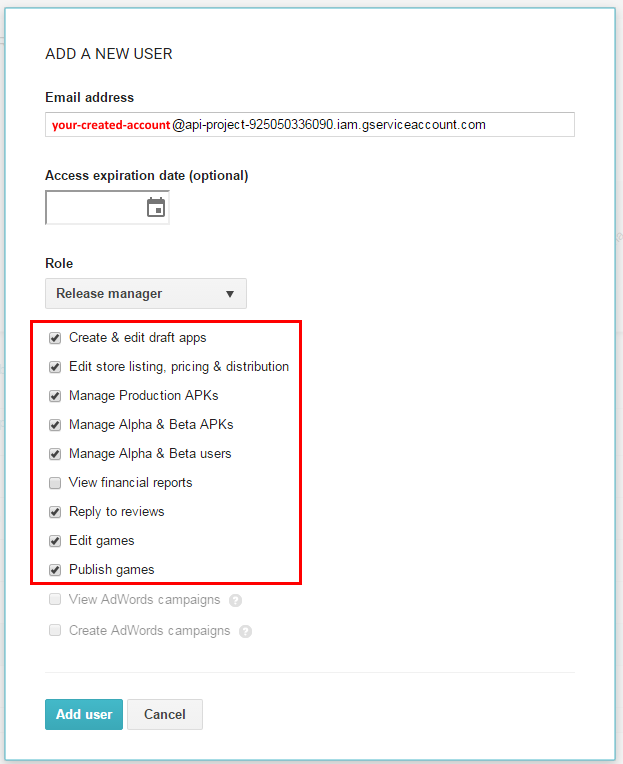
11. Check items as it is shown on the picture above and click Add user.
12. Then you can see your created user with Release manager access rights. Done!