
 Login
Login

Ads and In App Purchase
To set up ad removals in iOS you need the following information:
-
iTunes Product Id – to get it you should have a valid Apple Developer Account. To add an app to it you at first should click to create a web2phone copy. You will see a message with a checkbox:“This app will be added into your iTunes connect account. You will be able to configure “In App Purchase” settings for this app in iTunes connect and test it before app is submitted into Apple App store.”
Put a check and proceed. The app will be then added to your account and you can continue setting it up.
-
Go to https://itunesconnect.apple.com/WebObjects/iTunesConnect.woa and login
-
Manage your Apps –> Click on your app icon –> Select Manage In-App Purchases on the right –> tap Create New –> Select Non-Consumable type.
To set up ad removals in Android you need the following information:\n1. Google Play Product Id. You should have a valid Google Developer Account. Before setting up ad removals in your app you should submit it to Google Play without in app purchases settings enabled.\n2. Once submitted you can login to Google Developer Portal http://www.google.com/accounts/Logout?continue=https://play.google.com/apps/publish\n- Find the app you want to enable ads into\n- Open it and go to In-App Products in the menu on the left\n- Click Add New Product\n- Choose Managed Product category and enter your product id. It should be a unique id for your app. Example: For Construction Manager App we will use: ad_removal_for_construction_manager\n- Add a title and some description about your app\n- Enter the price ( you can auto-convert it)\n- Click Activate at the top and Publish your app changes\n- Copy your Product Id and paste it in the corresponding section in the Snappii editor\n3. Add your iTunes Product id in the editor and save the changes. Be sure to enable add removals in your app in the editor.
To be able to disable your ads your app users can purchase a one-time payment. To allow them to do it, drag and drop In App Purchase Button to a desired place in your app.
In a live app users will click it and be able to pay a fee to turn ads off.

1. You should have a valid Google Developer Account. Before setting up ad removals in your app you should submit it to Google Play without in app purchases settings enabled.\n2. Once submitted you can login to Google Developer Portal http://www.google.com/accounts/Logout?continue=https://play.google.com/apps/publish\n3. Open an app and go to Services & APIs, copy your base 64 encoded PSA public key\n4. Paste it in the corresponding section in the Snappii editor.
1. Register at https://apps.admob.com
2. Monetize your App
3. Find an existing app or add a new one manually
4. Enter your App Name (if manual) and choose the required platform, Add App
5. Select a required format
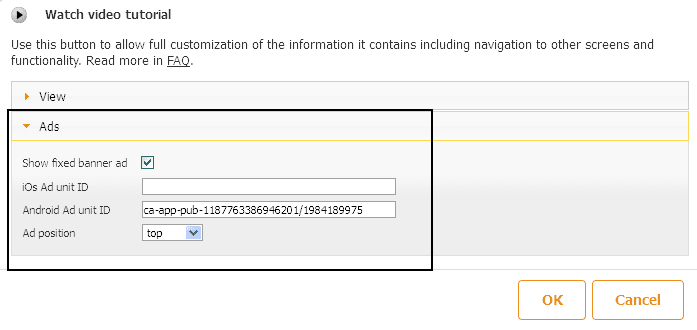
6. Once saved you will see an Ad Unit Id. Be sure to copy it and paste in the corresponding section in the Snappii editor.
Ad Unit Ids for Banner Ads should be specified for each tab/element separately while Interstitial Ads are set up just once in Ads and In App Purchase settings.
There is a special Ads section for it in all Tabs/Elements in the editor. You can either place Banner Ads at the top or at the bottom.
You can track and control a number of app user’s clicks before showing him your interstitial ad. Just enter a number and specify the places that will count users’ clicks.

