
 Login
Login

When uploading a data source (read more in our previous posts and FAQ) you will specify the fields which become available in the app later. Some of them are filled out at once using the values from the uploaded Excel spreadsheet. You can simply bind each button with corresponding value from a data source in the buttons settings. If you need to daily or more frequently add new information to it you will obviously like Snappii”s new feature. In the Advanced List settings you can setup if other users will be able to modify the content of your lists and add their own data or not. For instance only logged in users will be able to alter mobile business apps or any user will. As well Show Email Button option can be enabled to give app users an ability to send the information to any email address. It is really convenient to edit and update information when needed. Let”s see how it works in the app.I have added a list of various types of containers in the app and want to allow app users to add their own containers with pictures and modify the whole list if they don”t like anything.
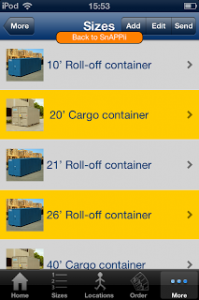
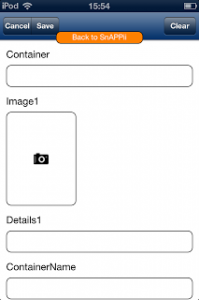
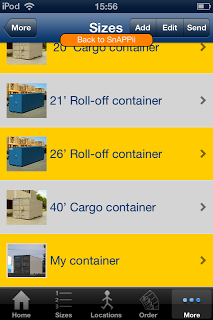
The first image shows how the list looks using already uploaded information. When I click on Add button it opens a form to be filled out. The fields are taken from the spreadsheet which was earlier uploaded as the data source and contained the fields such as Container, Image1, Detail1, ContainerName etc. The fields names must not contain uncommon characters and should be written without any spaces. Otherwise it won”t work. You enter information, upload images by choosing from your current image gallery or taking photos (iPhone or iPad camera). The third image displays what I got after filling in all the fields and uploading images. My item appeared at the bottom of the list. I can now easily modify it or remove by clicking on Edit button (see screenshot number 4).

As you see it is not difficult to create custom iOS mobile business apps in minutes with powerful and useful features. Everyone can try it our on Snappii site. No programming skills are required, just register at Snappii site and enjoy the benefits brought to your business by Snappii 2.0 release.

